So, last time we left off, I had successfully “borrowed” an open-source AstroPaper theme, wrangled npm into actually working, and had a fancy-looking tech blog running locally on my machine.
But a blog sitting on localhost:4321 isn’t much use to anyone, especially not to recruiters looking at my resume. I also realized pretty quickly that while writing posts in Markdown is great, manually typing out frontmatter (the metadata at the top of the file like dates, tags, and titles) every single time is not going to cut it for me, because frankly I can’t be bothered doing it.
I needed a way to write posts easily, and I needed a way to put the site on the actual internet.
In this post, we are tackling the first problem: Content Management.
The Problem with Raw Markdown
AstroPaper expects your blog posts to live in a folder called src/content/blog/. To make a post, you create a new .md file, and you have to format the top of it perfectly, like this:
---
title: My Awesome Post
pubDatetime: 2026-07-12T03:00:00Z
description: A short blurb about the post.
draft: false
tags:
  - webdev
  - astro
---
If you miss a space, format the date wrong, or forget a dash, the site breaks, so I needed a CMS (Content Management System). I just wanted something to give me a nice user interface that automatically saves my typing into Markdown files.
Enter Pages CMS
After some digging, I found Pages CMS.
It’s an open-source (yay), Git-based CMS. This means there is no database. You just log into their website with your GitHub account, grant it access to your blog’s repository, and it gives you a clean editing interface. When you hit “Save”, Pages CMS literally just commits the Markdown file straight into your GitHub repo. Cool.
How to wire it up to AstroPaper
To make Pages CMS understand how an AstroPaper site works, you just have to drop a single configuration file into the root of your project folder that holds the schema for the frontmatter. This gives the editing app (pages) what fields are required, and what formats are they in.
To set this up:
- Create a file called
.pages.ymlin your root directory. - Tell it where your media (images) go, and where your content (blog posts) live.
Here is the exact .pages.yml config I used to map AstroPaper’s default fields into a nice, clicky UI:
media:
  input: public/assets
  output: /assets

content:
  - name: blog
    label: Blog Posts
    type: collection
    path: src/content/posts
    view:
      fields: [title, pubDatetime, draft, featured]
      sort: [pubDatetime]
      default:
        sort: pubDatetime
        order: desc
    fields:
      - name: title
        label: Title
        type: string
        required: true
      - name: description
        label: Description
        type: text
        required: true
      - name: pubDatetime
        label: Publish Date
        type: date
        required: true
        options:
          time: true
          format: yyyy-MM-dd'T'HH:mm:ssXXX
      - name: modDatetime
        label: Modified Date
        type: date
        options:
          time: true
          format: yyyy-MM-dd'T'HH:mm:ssXXX
      - name: author
        label: Author
        type: string
      - name: featured
        label: Featured
        type: boolean
        default: false
      - name: draft
        label: Draft
        type: boolean
        default: false
      - name: tags
        label: Tags
        type: string
        list: true
        default: [others]
      - name: canonicalURL
        label: Canonical URL
        type: string
      - name: hideEditPost
        label: Hide Edit Post Link
        type: boolean
      - name: timezone
        label: Timezone
        type: select
        default: Australia/Brisbane
        options:
          values:
            - value: Australia/Brisbane
              label: Brisbane / Gold Coast (AEST)
            - value: UTC
              label: UTC
      - name: body
        label: Body
        type: rich-text
The Result
Once that file is in your GitHub repo, you just navigate to the Pages CMS app, log in, and select your repository.
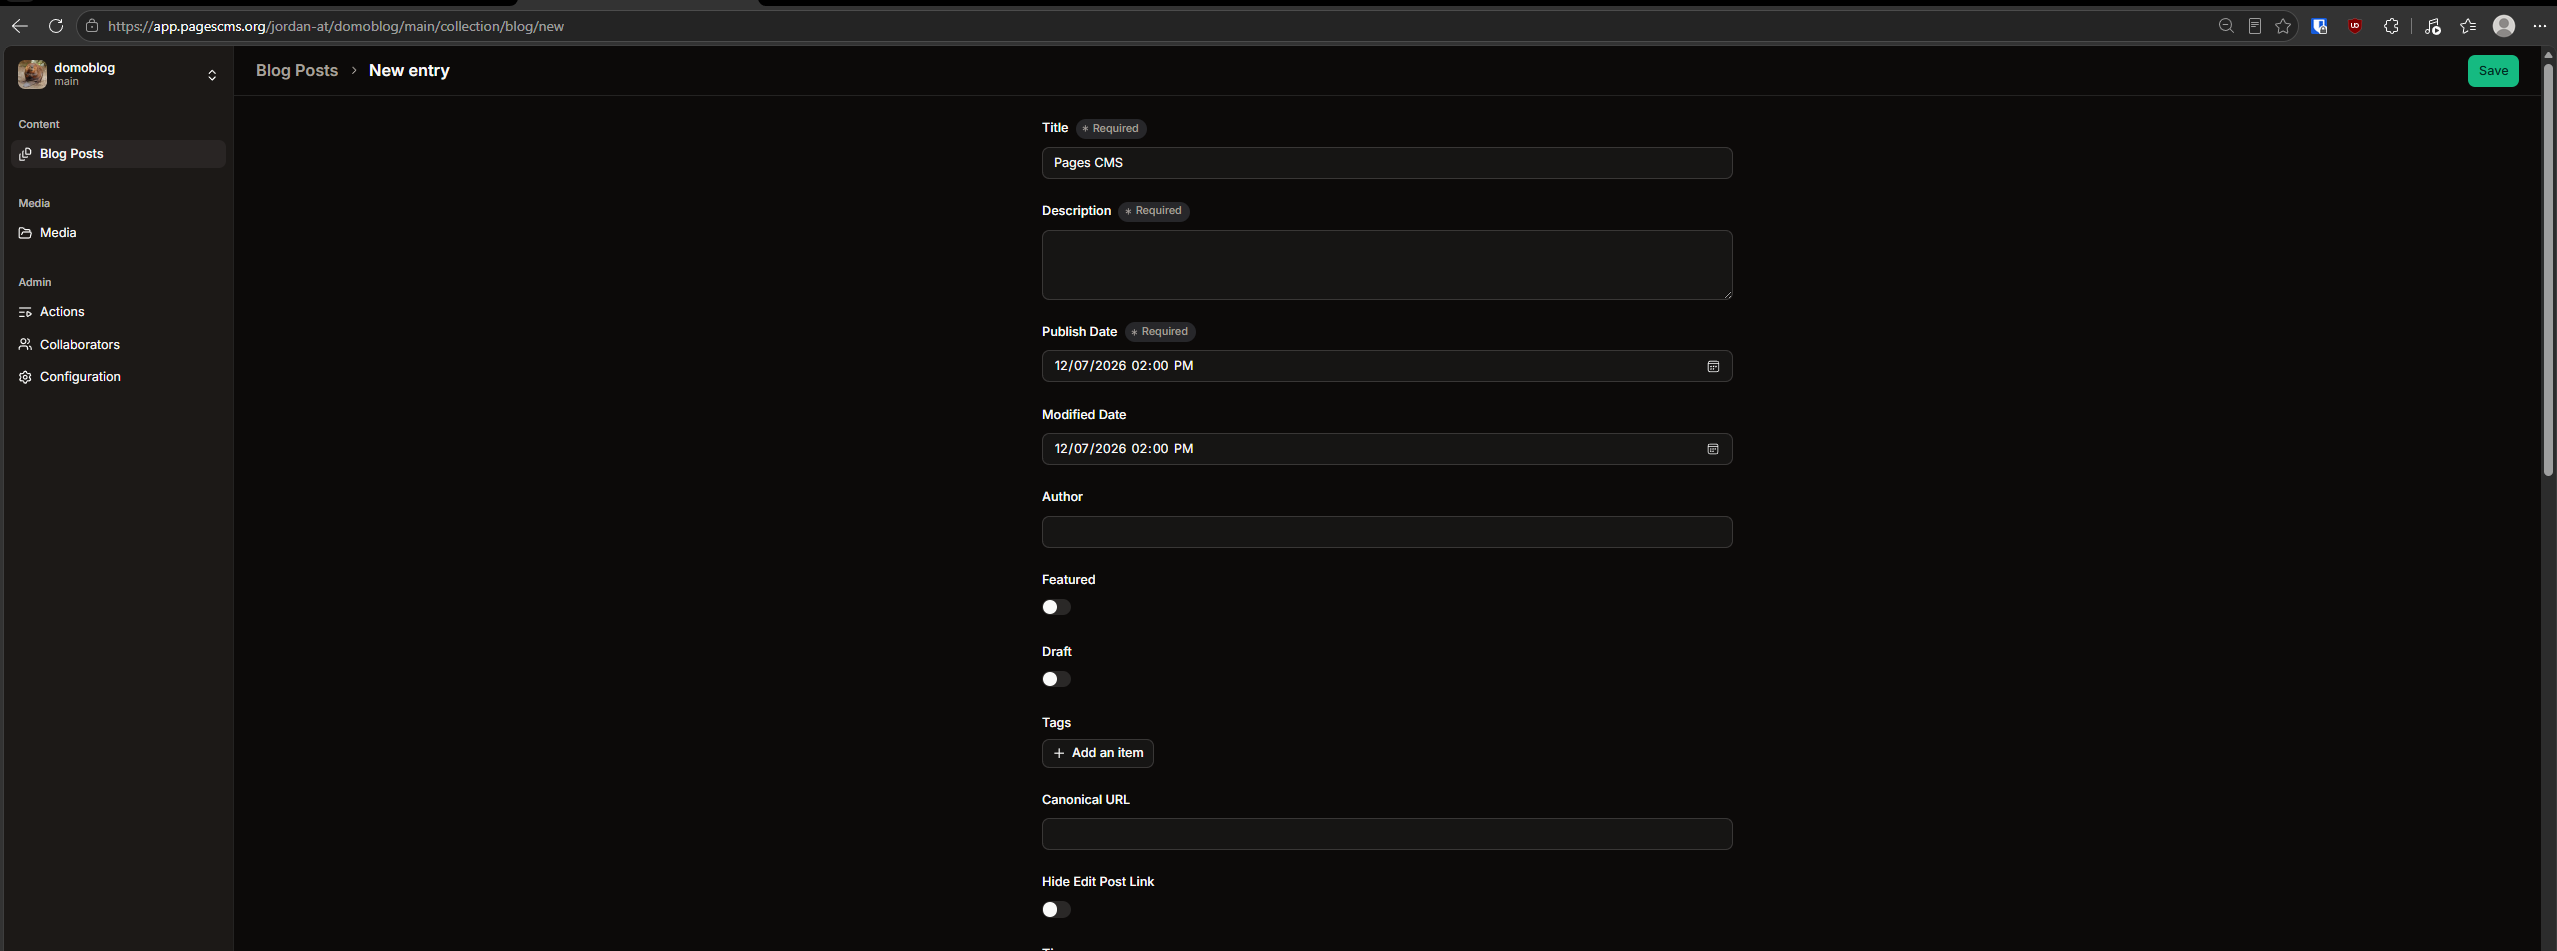
Now instead of manually saving markdown files into my project, I just use the UI to create new posts. It will generate the frontmatter automatically and add the file to my project. The options shown are based upon the yaml that we configured earlier.
But wait, it’s still not online?
You’re right. Currently, I have a great way to write posts and save them to GitHub, but my website isn’t actually being hosted anywhere that the public can see
How do we take a GitHub repository full of Astro code and Markdown files and turn it into an actual website, every time I hit save in Pages CMS?
Cloudflare!
But that’s a story for another post…
Ciao Bella